


Pin this post for later:
Table of Contents
Introduction
I had the privilege of participating in Catwalk for the Cats – a benefit fashion show where the proceeds went toward Comfort and Joy Cat Cafe and Teller County Regional Animal Shelter. This show was organized by the lovely Autumn Olive.
My collection, “Tabbies for Trans Rights,” seeks to highlight transgender identities. Each of my sweaters focused on a different sub-identity under the trans umbrella. The Burn the Binary sweater represents nonbinary folks and was modeled by a nonbinary person named Callia (they/them).
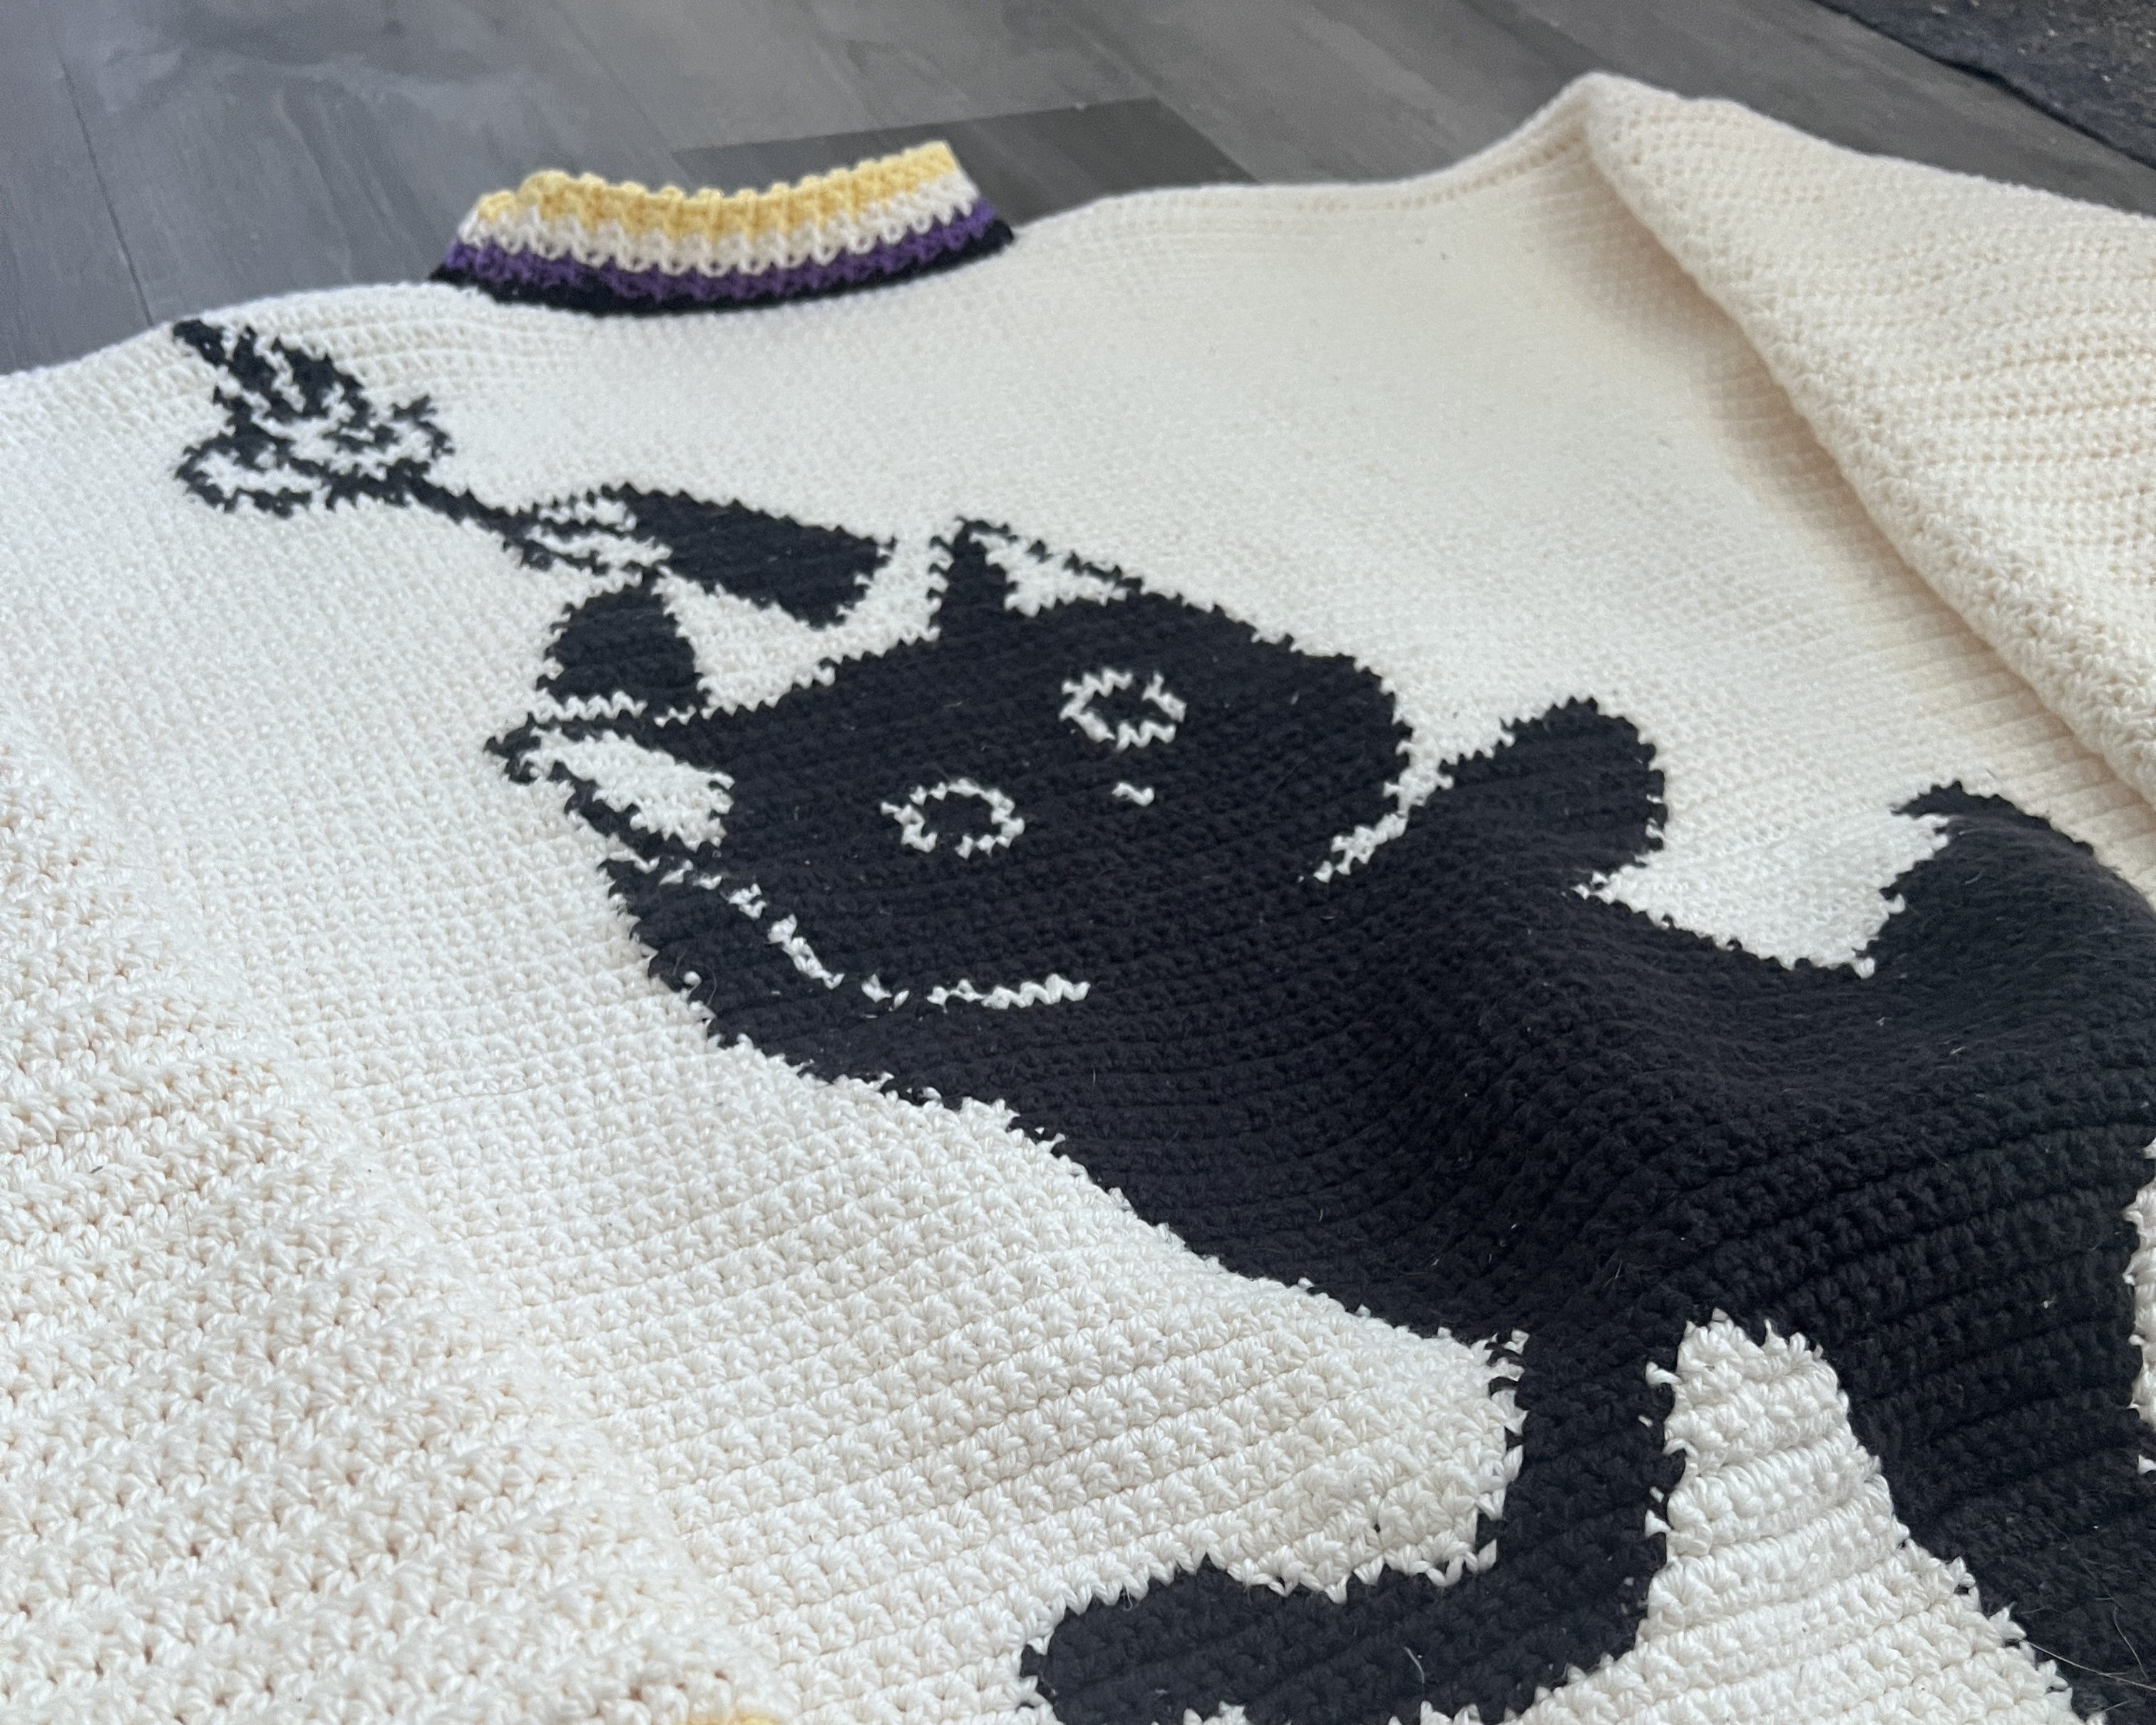
This was the first sweater I designed for the collection. I had only done a handful of tapestry crochet pieces before, and never a tapestry sweater, so this was a big undertaking for me.
Buy the Sweater
The sweater I made will be available for sale after the fashion show!
70% of the proceeds go toward Comfort and Joy Cat Cafe and Teller Regional Animal Shelter.
Check them out in my shop!
The Graph
Below is the graph for the tapestry – download the free PDF here:

I made the design in Canva, then used an app called Pixel Grid to translate this to a graph.
Making the Sweater
Basic Construction
This sweater is a fairly simple construction. The body of the sweater is consistent of 2 panels for the front and back with minimal neck shaping. I worked the sleeves flat then sewed them up the side and attached. I finished off the sweater with ribbing around the neck, cuff, and bottom.
Sizing
The trickiest part about this sweater is getting the sizing right. Since the graph had a set number of rows and stitches, I needed to ensure it would fit onto the ideal size panel for the model’s measurements. This took a few gauge swatches to perfect. I knew I had to fit 116 rows into 22.5″ to fit the model. Using worsted weight cotton yarn, I landed on using a 3.5mm hook with single crochet to get the gauge right.
Once I figured out the right guage for the height, I used my swatch to determine how many stitches I needed in the panel to fit the model’s bust size. This was more than the 70 stitches needed for the graph. I took the total stitches needed to meet gauge – 70 and divided by 2 to figure out how many extra stitches to add on each side of the graph.
Neck
For the neckline, I took the total number of stitches across the panel and divided it by 3 to make the two shoulder sections and the neck. I added 3 rows to the front and 2 rows to the back panel for the neck shaping.
Sleeves
For the sleeves, I opted to use half double crochet instead of the single crochet I used for the panels to add some variety to the texture and to make it a bit less stiff.
Using the models bicep measurements, I determined how many stitches I needed at the top of the sleeve. I then worked flat in a panel, decreasing every other row until I got to the length I needed.
Ribbing
Usually when I do ribbing, I work it directly onto the sweater using single crochet back loop only, slip stitching into the sweater as I go. However, since I wanted my ribbing to have horizontal striping, but sc blo ribbing is worked horizontally, I needed to have 4 working colors of yarn. Because of this, I opted to work the ribbing separately and sew it on after so that the 4 strands of yarn wouldn’t get tangled in the sweater as I turned my work.
The Collection
Check out the pattern notes for my Cat Cardigan and Kitties Instead of Titties sweater here:


Leave a Reply